Showing: Isle of Neasied only.
Strange Silver Etched Skulls
Silver skulls are hidden all over the island. Bring them to the skull door (Strange Voices in your journal) and it rewards you as your collection grows. Tick them off here as you go: the checklist is shared with the map, and loading your save ticks them for you.
0 found of 0 in the areas you've reached.
to see your count.
Tip: the Skull Charm fits the Mask of Second Sight and helps you find skulls.
Rewards
Reward names are blurred. Tap one to reveal it.
- 10 skulls
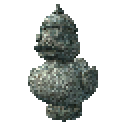 Ancient Stone Duck Figurine
- 20 skulls
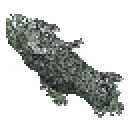 Fossilized Fish
- 30 skulls
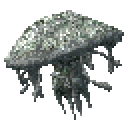 Flying Mushroom Fossil
- 40 skulls
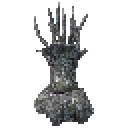 Fossilized Anemone
- 50 skulls
 Sonic Crystal Fossil
- One more when you've brought them all.
Where to hand them in
 In an area past your progress. Tap to reveal.The skull door, on the Final Zone map · Show on map
Where to find them
Directions are as seen on our map, with north at the top.
Isle of Neasied
- 1In an area past your progress. Tap to reveal.By the Ancient Coin chestabout 60 m north-west of the Knight's Encampment monument · Isle of Neasied · Show on map
- 2In an area past your progress. Tap to reveal.By the Rusted Longhammer chestabout 70 m east of the Cemetery Precipice monument · Isle of Neasied · Show on map
- 3In an area past your progress. Tap to reveal.About 60 m east of the Knight's Encampment monumentIsle of Neasied · Show on map
- 4In an area past your progress. Tap to reveal.About 160 m north-west of the Cemetery Precipice monumentIsle of Neasied · Show on map
- 5In an area past your progress. Tap to reveal.About 20 m east of the Cemetery Precipice monumentIsle of Neasied · Show on map
- 6In an area past your progress. Tap to reveal.About 210 m south-east of the Knight's Encampment monumentIsle of Neasied · Show on map
- 7In an area past your progress. Tap to reveal.About 360 m south-east of the Knight's Encampment monumentIsle of Neasied · Show on map
Umbada's Islet
- 8In an area past your progress. Tap to reveal.About 90 m east of the Familiar Location monumentIsle of Neasied · Show on map
Obmuer Temple
- 9In an area past your progress. Tap to reveal.About 60 m north-east of the Aganmi's Camp monumentIsle of Neasied · Show on map
- 10In an area past your progress. Tap to reveal.About 140 m south-east of the Prison Corridor monumentObmuer Temple, Basement 3 · Show on map
- 11In an area past your progress. Tap to reveal.About 90 m north-east of the Sacred Cistern monumentObmuer Temple, Basement 4 · Show on map
- 12In an area past your progress. Tap to reveal.Right by the Lift Room monumentObmuer Temple, Basement 5 · Show on map
Tower of Knowledge
- 13In an area past your progress. Tap to reveal.Beneath the Isle
- 14In an area past your progress. Tap to reveal.Tower of Knowledge, Floor 11
- 15In an area past your progress. Tap to reveal.Tower of Knowledge, Floor 16
- 16In an area past your progress. Tap to reveal.Tower of Knowledge, Floor 4
- 17In an area past your progress. Tap to reveal.Tower of Knowledge, Floor 5
Deimpo Mausoleum
- 18In an area past your progress. Tap to reveal.About 60 m south-west of the Lower Area monumentBeneath the Isle · Show on map
- 19In an area past your progress. Tap to reveal.About 110 m west of the Lower Area monumentBeneath the Isle · Show on map
- 20In an area past your progress. Tap to reveal.About 40 m west of the Crumbling Stairwell monumentIsle of Neasied · Show on map
Ventilation Shaft
- 21In an area past your progress. Tap to reveal.About 25 m east of the Ventilation Shaft monument
- 22In an area past your progress. Tap to reveal.By the Silver Sipeha Statuette chestabout 30 m south-west of the Ventilation Shaft monument · Show on map
- 23In an area past your progress. Tap to reveal.Where you fight Poenir, Rotten Wings of Despairabout 260 m south-west of the Puwema's Rest Room monument · Mausoleum Depths · Show on map
- 24In an area past your progress. Tap to reveal.About 270 m west of the Puwema's Rest Room monumentMausoleum Depths · Show on map
Ancient World
- 25In an area past your progress. Tap to reveal.About 130 m west of the Ossi's Lab monumentAncient World · Show on map
- 26In an area past your progress. Tap to reveal.About 210 m north-west of the Overlook monumentAncient World · Show on map
- 27In an area past your progress. Tap to reveal.About 240 m west of the Overlook monumentAncient World · Show on map
- 28In an area past your progress. Tap to reveal.By the Soldier's Shock Blade chestabout 90 m west of the Scrap Yard monument · Ancient World · Show on map
- 29In an area past your progress. Tap to reveal.By the Grenade chestright by the Overlook monument · Ancient World · Show on map
- 30In an area past your progress. Tap to reveal.About 80 m south-east of the Ossi's Lab monumentAncient World · Show on map
- 31In an area past your progress. Tap to reveal.About 190 m west of the Overlook monumentAncient World · Show on map
- 32In an area past your progress. Tap to reveal.About 120 m east of the Ossi's Lab monumentAncient World · Show on map
- 33In an area past your progress. Tap to reveal.About 270 m south of the Ossi's Lab monumentAncient World · Show on map
- 34In an area past your progress. Tap to reveal.About 100 m south-east of the Ancient World Wing AltarAncient World · Show on map
- 35In an area past your progress. Tap to reveal.About 140 m south-west of the Scrap Yard monumentAncient World · Show on map
- 36In an area past your progress. Tap to reveal.About 110 m north-east of the Ancient World Wing AltarAncient World · Show on map
- 37In an area past your progress. Tap to reveal.About 60 m west of the Ancient World Wing AltarAncient World · Show on map
Siraatsu Castle
- 38In an area past your progress. Tap to reveal.Siraatsu Castle, Basement 1
- 39In an area past your progress. Tap to reveal.About 280 m south of the Halls of Disrepair monumentSiraatsu Castle, Floor 1 · Show on map
- 40In an area past your progress. Tap to reveal.Siraatsu Castle, Floor 3
- 41In an area past your progress. Tap to reveal.Siraatsu Castle, Floor 3
- 42In an area past your progress. Tap to reveal.Siraatsu Castle, Floor 3
- 43In an area past your progress. Tap to reveal.About 100 m north-east of the Foyer monumentSiraatsu Castle, Ground floor · Show on map
Underworld
- 44In an area past your progress. Tap to reveal.About 15 m east of the Halls Shrouded in Darkness monumentUnderworld · Show on map
- 45In an area past your progress. Tap to reveal.Right by the Halls Shrouded in Darkness monumentUnderworld · Show on map
- 46In an area past your progress. Tap to reveal.About 100 m south of the Crimson Grotto monumentUnderworld · Show on map
Forgotten Dungeon
- 47In an area past your progress. Tap to reveal.About 80 m north of the Pit of Despair monumentUnderworld · Show on map
- 48In an area past your progress. Tap to reveal.About 100 m east of the Pit of Despair monumentUnderworld · Show on map
- 49In an area past your progress. Tap to reveal.About 50 m west of the Pit of Despair monumentUnderworld · Show on map
- 50In an area past your progress. Tap to reveal.Where you fight Black Skeletal Witch Husipoabout 40 m north of the Pit of Despair monument · Underworld · Show on map
- 51In an area past your progress. Tap to reveal.About 140 m north-east of the Pit of Despair monumentUnderworld · Show on map
Verdant Hollow
- 52In an area past your progress. Tap to reveal.About 100 m south-east of the Verdant Hollow Wing AltarThe Depths · Show on map
- 53In an area past your progress. Tap to reveal.About 60 m south-east of the Verdant Hollow Wing AltarThe Depths · Show on map
- 54In an area past your progress. Tap to reveal.About 160 m south of the Lakeside monumentThe Depths · Show on map
- 55In an area past your progress. Tap to reveal.About 70 m south-west of the Lakeside monumentThe Depths · Show on map
- 56In an area past your progress. Tap to reveal.About 80 m north-west of the Lakeside monumentThe Depths · Show on map
- 57In an area past your progress. Tap to reveal.About 70 m south of the Verdant Hollow Wing AltarThe Depths · Show on map
- 58In an area past your progress. Tap to reveal.About 200 m south-east of the Halls Shrouded in Darkness monumentUnderworld · Show on map
Rotting Cavern
- 59In an area past your progress. Tap to reveal.About 150 m north-west of the Sacred Cistern monumentObmuer Temple, Basement 4 · Show on map
- 60In an area past your progress. Tap to reveal.About 140 m east of the Decaying Great Tree monumentThe Depths · Show on map
- 61In an area past your progress. Tap to reveal.About 150 m north-east of the Decaying Great Tree monumentThe Depths · Show on map
- 62In an area past your progress. Tap to reveal.About 25 m east of the Crumbling Fortress monumentThe Depths · Show on map
- 63In an area past your progress. Tap to reveal.About 50 m east of the Temple Entrance monumentThe Depths · Show on map
- 64In an area past your progress. Tap to reveal.About 80 m south-east of the Decaying Great Tree monumentThe Depths · Show on map
Record of Sin
- 65In an area past your progress. Tap to reveal.About 40 m north of the Record of Sin Wing AltarRecord of Sin, Ground floor · Show on map
- 66In an area past your progress. Tap to reveal.About 200 m east of the Cliff Edge monumentThe Depths · Show on map
Petrified Garden
- 67In an area past your progress. Tap to reveal.Final Zone
- 68In an area past your progress. Tap to reveal.About 40 m west of the Stone Hut monumentThe Depths · Show on map
More about the skull itself on its item page.